Showing posts with label mini frames. Show all posts

Saturday 28 December 2013

Recycled Projects - Looking back at the Creative projects

I thought that I would look back on some of the projects that I have done over the past few months.  I had been making quite a few things in my studio and once I began to share them I found that I began to have a bit more direction in what I was making.  I have quite a few favorites with the things that I have made so far, I have been quite taken with the mini wall hangings and have been experimenting with a few varieties, which I will be sharing in the new year and showing a tutorial of the process.  Click on the image to take you to the post that gives you a better look at them.  To see how they were made you need to go to the Tutorial Tuesdays posts.

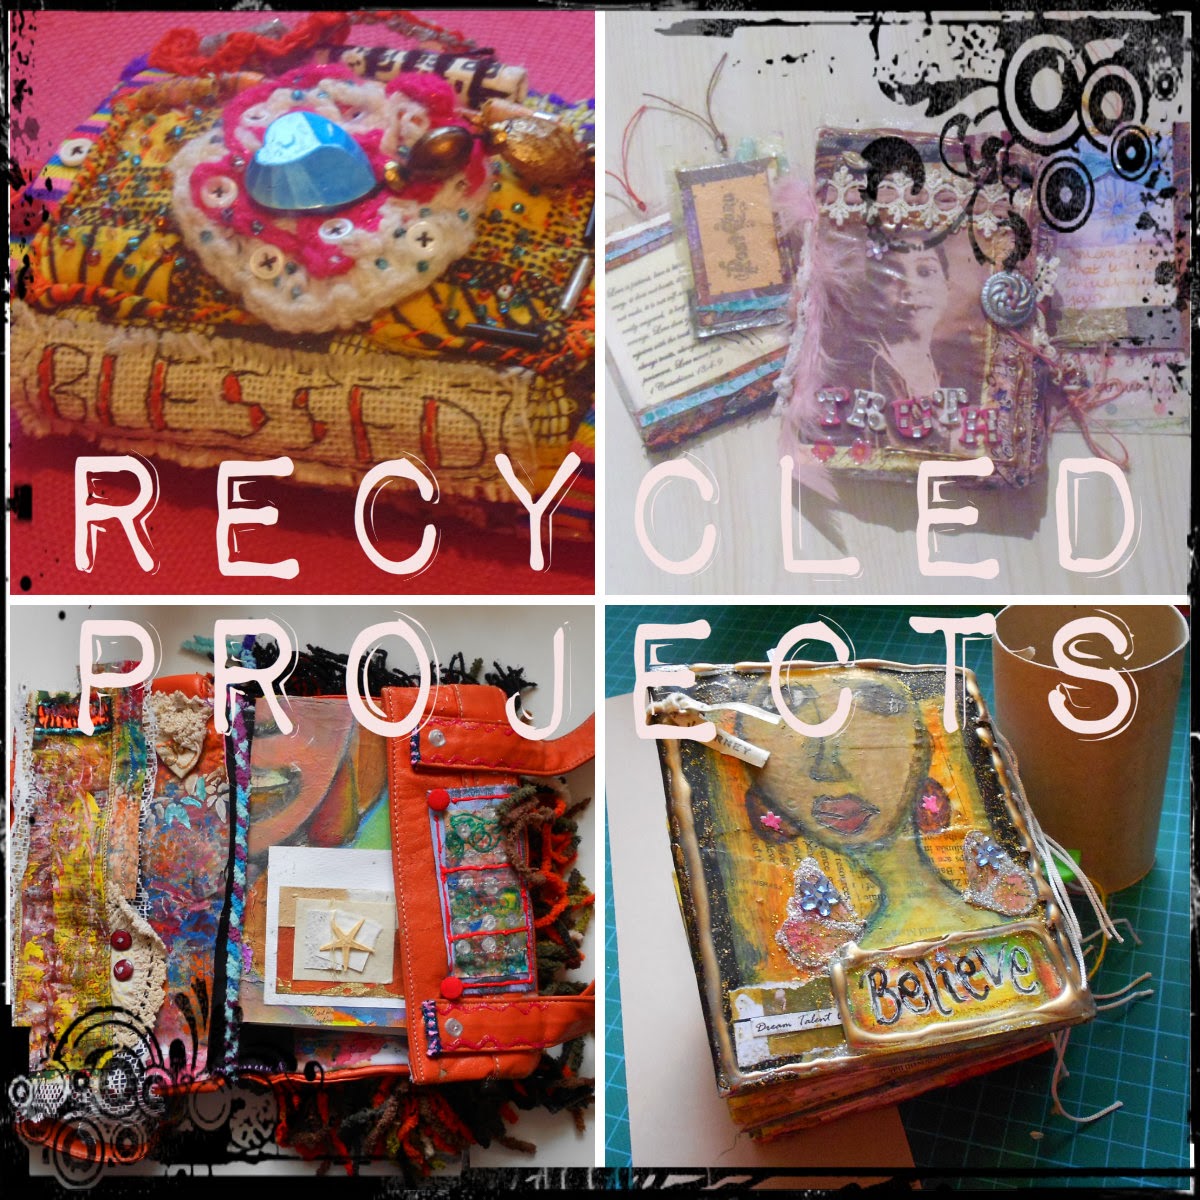
These were great to make, you can use most of the scraps of paper you have in your stash, create little toppers and make some really encouraging wall hangings.  Because the foundation is cardboard they are fairly light in weight.
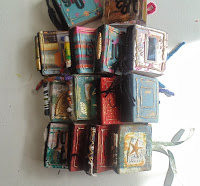
Mini Wall Hangings
The mini necklaces again use cardboard as their base, with the addition of the seeds or quinoa it adds some weight.  These were topped with air drying and fimo clay pieces.
Mini Necklaces
What do you do with the teabag box when you finished with it - make a treasure box, these can hold trinkets or even the teabag treasures below if you made any
Teabag Boxes Treasure 
These mini toppers are made from the out of date teabags that got lost at the back of my cupboard.  After emptying the contents the bags were decorated and I have used them as part of other projects.
Teabag Treasures
Chunky journals, the basis for these were toilet rolls and cardboard from packaging to make the front and back covers.  The tags were made from recycled card and paper scraps.
Chunky A6 Journal
This was also a favourite making the stamps.  There are so many designs and layouts that you can be inspired by and you can take elements of the designs and create your own one of a kind stamps for use in your journals or artwork.  The stamps were created using the foam from a sleeping bag mat.
Handmade Stamps
Every few months we seem to be getting new phone directory through the mail box, I found a creative use for them and made these journals.
Directories Journals
Another chunky toilet roll journal, these one is quite thick in size, and I made quite a few tags to go with it.
Chunky Toilet Roll Journal
Capturing moments journals are made from card and while they are bound require no stitching.  I really enjoyed making these!
Capturing Moments Mini Journals
Cereal bag journal takes the bag of your favorite cereal and allows you to add different enclosures before sealing with an iron.
Cereal Bag Journal

I hope to continue to find creative ways to recycle and up-cycle the things that we have in our every day life and can quite easily throw away and to see some of your ideas and things that you make, do share things that you have found or been inspired by that you either create for yourself, or give away. What has been your favorite recycled project in the ones above.  Blessings!

Tuesday 10 December 2013

Tutorial Tuesday - Mini Frames

Tutorial Tuesday

Tuesdays' Mini Frames
I made a selection of mini frames at the end of November alongside some that I made into necklaces and I thought I would show you just how easy it is to create your own, from recycled materials that you probably have laying around your home.  Here is another look at the selection that I made, but you can check out the post HERE


You can create any size that you want, but I guess the small ones have a cuteness to them!

To make your own you start with the following tools.

You need cardboard from any packaging you might have laying around, 
selection of interesting images from magazines, 
handmade embellishments in a variety of sizes, 
glue, paint, 
jewelry findings - if you are going to turn it into an item of jewelry
Cardboard being recycled for a creative project
 Cut the cardboard to the required size, and select the image or embellishments that you want.  Mine measure 2 inches x 1 inch and the one with the circle embellishment measures approx 1.5 inch x 3/4 inch
Use whatever paper you have available
 I covered both sides of the cardboard with paper first,
 a couple of layers should do, then let them dry
You can use gesso or paint of choice
 Once dry, coat them with gesso, again a couple of coats and leave to dry
The stamp is for the back of the project to add interest
 I stamp the back of mine as I am going to make them into jewelry, using the stamps I made in a previous post HERE
 Once the ink has dried, give them a coat of pva glue and this will seal it.
 Attach you image to the front.  The embellishment was made using clay, painted black and highlighted with goldfinger paste.  The bear image was taken from a catalog.
Applying the glue
 Applying glue around the embellishment and the image I coated them with quinoa (which had passed its' sell-by date) and allowed them to dry
 As the embellishment was raised I applied a second coat of glue and then another coat of quinoa

 Once they had dried I coated them with paint in pewter which gives it a metallic look
Inexpensive jewelry - one of a kind
Completed necklaces with highlights of goldfinger paste.  I attached a finding and faux leather thong! 

I hope you have a go and let me see your results.  You can try using a range of materials that will give different textures and look to your project, and also try different shapes. Do have fun and share your results.  Until next week!


Monday 14 October 2013

Tutorial Tuesday


Each week on Tutorial Tuesday I will be showing you how to make the recycled projects that I have made over the weeks. Here is a list of all the current tutorials, click on the link to take you to the post.

Related Posts Plugin for WordPress, Blogger...