Showing posts with label stencils. Show all posts

Wednesday 18 January 2023

Creating a Recycled Art Journal - Use those Catalogues!

Welcome to my latest art project where we will be creating a recycled art journal using an old catalog. 


This project is quick, easy and affordable, and the best part is that nothing will be wasted!  You get to use some of those store catalogues that you have been collecting and create some wonderful projects.


To start, find yourself an old catalog, like this Tesco's home catalog that I'm using. The first thing you need to do is rip out about half of the pages. This is because we'll be adding collage and texture to the pages, so you want to make sure you have enough space to work with. Go through the catalog and rip out every 2-3 pages.  I save the ripped out pages to use later.


Once you have removed the pages, stick together sets of 2 or 3 pages depending on where you ripped them out. Allow the pages to dry and then reinforce the spine with some masking tape on the inside.  If you are going to be adding paint it stops any bleed through on the other pages.

I also add masking tape to the edge of the pages that I have stuck together This will also make it easy to turn the pages.


With the pages left over, look through them and cut out images or words that speak to you. I select colorful patterns and shapes and these will form part of your collage. This is a great way to still create something without having to have a lot of art supplies or anything fancy. All you need is a catalog, glue, and some basic tools.


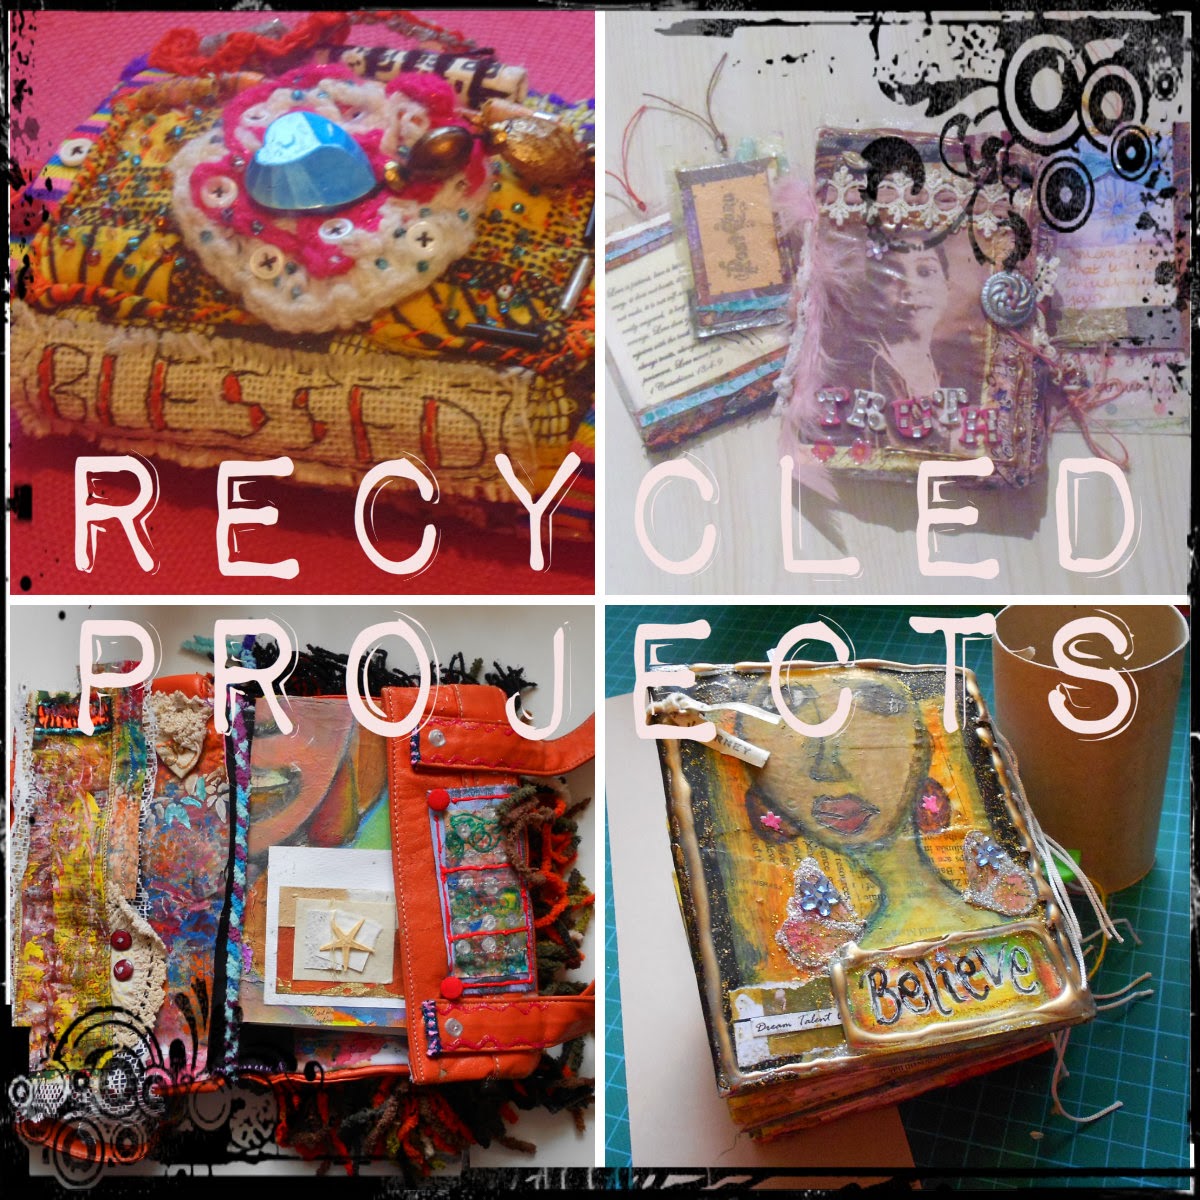
Come and join me in the next video, I'll show you how to work on some of your pages, and ideas from other recycled journals that I have created. This art journal will be a space for you to fill up over time, write down your thoughts, and enjoy the creative process. It's all about play, so have fun with it!

*************************************************************

If you would like to take it a step further and make your own stamps and stencils, then check out my FREE online course Recycled Stamps and Stencils where I show you how you can take items that you may have around the home and turn it into something that you can use in your art journals. 

You get a video on how to create the stamps and stencils, a digital download of the stamps and stencils that I created, background papers and more!  Check it out HERE


Monday 22 January 2018

My 31 Art Studio Essentials - Stencils

I am so glad you could join me in my studio for the Art Studio Essentials Daily Series that will help you to kick start your creativity and to check out some supplies.  

Today I will be playing about with my stencils which come in all shapes and sizes, you can make your own or re-purpose other equipment.

Check out the Video Below


I have collected a wide variety of stencils over the years and first started out with the stencils you use to decorate your walls, and initially used the Dover Stencils on card that you cut out.  This then led me on the journey to find out more and get different designs.

 Do you have neglected art supplies hanging around waiting to be used, you don't want your stencils to come to the same fate.  

Check out what you can recycle and create your own stencils! 

I found ways to create some of my own stencils and these ones are from the humidifiers you can buy with a plastic lid, the lid with its patterns makes a great stencil.  

You can create some yummy texture from homemade stencils

In the video above I will show you how I use some recycled examples to make stencils.  Being creative and thinking outside the box will help you to deal with those times that you feel stuck by using your supplies in different ways.

These stencils below are using the sink mats that you can get in different shapes and sizes, the patterns are great and can create some lovely effects.

You can also create a cheap stencil from a Sink Mat!

Sometimes all we need is 5 minutes for some creative play, and you will feel so much better once you have done something, there are so many ways in which you can fit creativity into your every day!


I do hope that you get out your supplies and have some fun!

Dover Books Has over 80 Books on stencils for you to choose from

Dover Books


Paper Crafting Magazines


Stay blessed and be a blessing!

Wednesday 14 May 2014

How did you do that? Things to do with Paper Stencils!

I shared on Saturday some cool Paper Stencils that I was inspired to make after seeing Matrices site and having a go.  Here are some more that I created, and I will at some point share with you some of the designs that I manage to make.


Creating new styles, these would make really cool reusable stencils!
I promised I would share some of the cool effects once you cut them out that you can get, you can use your Gelli plate apply the stencil and transfer an image to paper and you also get paint on the stencil itself.  Because the paper is quite thin your unlikely to use the stencil to transfer an image again, but you can use the stencil in your art and they can provide you with some interesting backgrounds.  By creating the paper stencil on thicker card or paper you will be able to use it a number of times, even try transferring the image to an acetate sheet and cutting out.

Once you start cutting you are not going to want to stop, you can come up with some really pretty designs as seen above.

 Here is one that I used with the Gelli plate, using a selection of colors will add to the effect

Simple cuts in the paper can create interesting results
 I got more adventurous with cutting and came up with more intricate designs, but due to the thinness of the paper once you had put it on the gelli plate they tore when being picked up.  I guess if you used it with sprays it would have been easier.
I wanted to see how they would print on fabric and used this design on the gelli plate
Chamois leather used on Gelli plate with paper cut
  Here is some cheap chamois leather that I printed on, and it came out quite well.  I am and looking forward to making something with it and will show you next week in Material Mondays.

Once you have used the stencil in on the gelli plate you have some really interesting colors and designs on the paper and you can use these to make your own wrapping paper by sticking it to your paper of choice
Paper cuts used on gelli plate can be used for other creative projects!
 I am going to attach some of mine to some white or black card and frame it as it, I think these are gorgeous.

Another thing I did with some of the thinner cut outs, was to apply them to journal pages as a background layer.

Paper cut applied to journal page
 After it dried I began to sketch out an image, keeping it simple and trying to keep as much as the design of the paper as possible.
Once dry add your image
 Once I was satisfied I added gesso and started painting
Adding gesso and paint to paper cut
 It was interesting starting a painting in this way, seeing what comes up as you add more colour
 Not being prescriptive as to what you wanted the finish piece to look like, but enjoying the play

And here is the finished painting.  

Mixed media Painting using Paper cutting

I am sure there are other things you can do with the paper stencils, if you come up with some ideas do share.  Check back for Material Mondays to see what I do with the Chamois leather.  Stay blessed and be a blessing!


Saturday 10 May 2014

Recycled projects - Paper Stencils and masks


I came across a tutorial by Martice Smith II which was quite inspiring, it was her intricate paper stencils and gift wrap ideas, where she creates a stencil and uses some of the designs in making your own customized wrapping paper.

Always one for having a go I thought I would make a few of my own.  I guess it is similar to paper cutting, which I never thought I would have the patience for, you can get some really intricate and beautiful designs.

For these I took some construction paper which is quite thin that had been used on one side, you can use any type of paper you like, and it is a great way to use up those pieces of paper that you would put in the recycle bin. To cut these I just used a pair of scissors, making it easy to get instant results, you could also use paper punches in some areas.
Keep the designs simple to get really great results

After you have folded your paper into a triangle and then folded a further two times you can mark out a simple design on one side.

Cutting away areas on the paper 

Cut them out, and voila you have some lovely stencils and masks below that you can use in a number of different ways.

Paper stencils - one of my favourites

Squares cut out gives an interesting design

I couldn't resist doing a few more

Simple shapes create lovely effects

and here is how they turned out

The simple designs are the most effective
 These can be used as a stencil or a mask when using the Gelli plate but the possibilities are endless!

I am going to use these to create some more Gelli prints - see my previous Gelli prints tutorial, and I will show you how the designs look on Tuesday and I will probably use these background papers to decorate some handmade books I am toying with. I will also show you how you can take the stencil once you have used it in a mixed media background.

Do check out Martice's site, she has very generously shared some of her designs in a free ebook, you need to sign up to access.  Have fun and allow your creativity to soar!


Thursday 20 March 2014

Soul Food....Surprise package!

Soul Food

I got a surprise package in the mail a couple of weeks ago, I was blessed to win the February prize draw which consisted of a set of stencils from Artist Cellar


The stencils are from the Cathedral Plans series and Old World Map series, can be used as a mask or as a stencil and are made from quite a hard wearing plastic.  I have been playing around a bit using gesso, a fairly thick modelling paste and working on fabric.

Here is a sneak preview of a few books that I have been altering.
Stencils used from the Old World map series by Artist Cellar
On this book, which was from my local pound store I used fine poly-filler.  After it had dried I had to sand it down slightly before painting.

I haven't finished with them, but I like how they turned out so far.  I also used the same stencil on some fabric to see how it would look.  I decided that I will be using it for a lesson with Susana Tavares who is showing us how to make a fabric Art Doll


Stencils used on Fabric
There are so many more techniques that you can try out with the stencils, they are very durable and wash out with warm soapy water, can be used on their own, or with other mixed media tools. I am looking forward to sharing some of the ways I get to use mine.  What new techniques have you been trying out?  

Tuesday 17 December 2013

Tutorial Tuesday - DIY Washi Tape - using Masking tape

Tutorial Tuesday

I have been playing about with making my own Washi Type tape, using masking tape, and here is some I made creating a variety of different designs


Here is a journal that I used the tape on and created a series of layers for the cover.

 I got a sheet of plastic and a roll of Masking tape about 11/2 inches thick
 I spread out strips of the tape on the plastic sheeting
 And then selected some paints to use on the tape.  Here I am using inktense blocks and art bars.
Once you have painted each of the strips with a layer of colour to suit you let it dry
 I then chose a selection of stencils and stamps to each of the strips of tape
 You can put as much pattern or as little pattern as you like
 I have used some paint with these ones and then applied glitter
 And with some of them I kept it more simple

Once done I covered some card and an empty foil roll with sellotape and then wound it round each.


Related Posts Plugin for WordPress, Blogger...